Prepare your anchor system in advance
Lesson 1
Anchor Installation
Back to: Farm Installation
Preparing to Deploy
Prepping, moving, and installing your anchors is a time-intensive endeavor that should be done well in advance of when you’re planning to outplant. Don’t leave this to the last minute! You’ll want to install your anchor system, at minimum, one week before you plan to install your growlines so that the system has a chance to settle, and you can address any issues that arise.
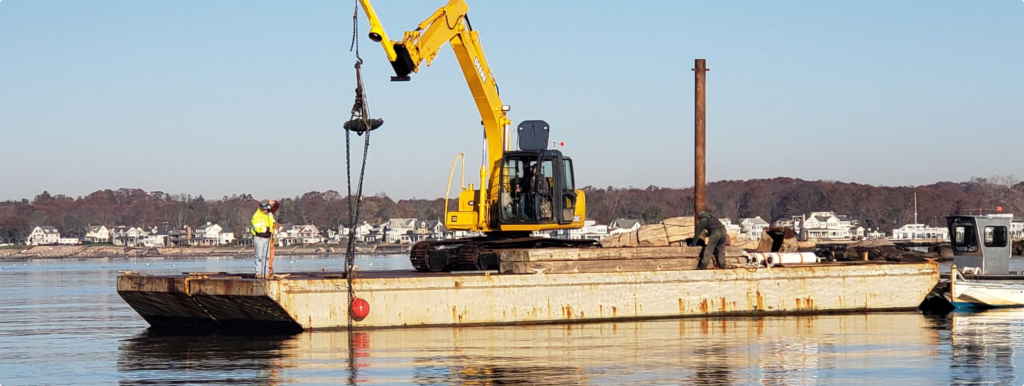
Installing anchors on your farm site will look different depending on the type of boat you own and the type of anchor you’re planning to deploy. For concrete, deadweight, or other exceptionally heavy anchors, you may need to hire a barge or large boat to help you with the installation. This will require an extra layer of logistics to coordinate with the boat or barge owner and try and hit a weather window – another reason it pays to start this process early.
Regardless of how you plan to install your anchors, you’ll want to:
-
-
Mark the locations of your anchors
Pro Tip
Make sure to check your permit to ensure there are no date restrictions on when your gear can be installed. Some permits require the removal of all of your gear, anchors included, during certain times of year. If that is a stipulation of your permit, make sure you have a plan for how you’ll remove your anchors before you throw them overboard.
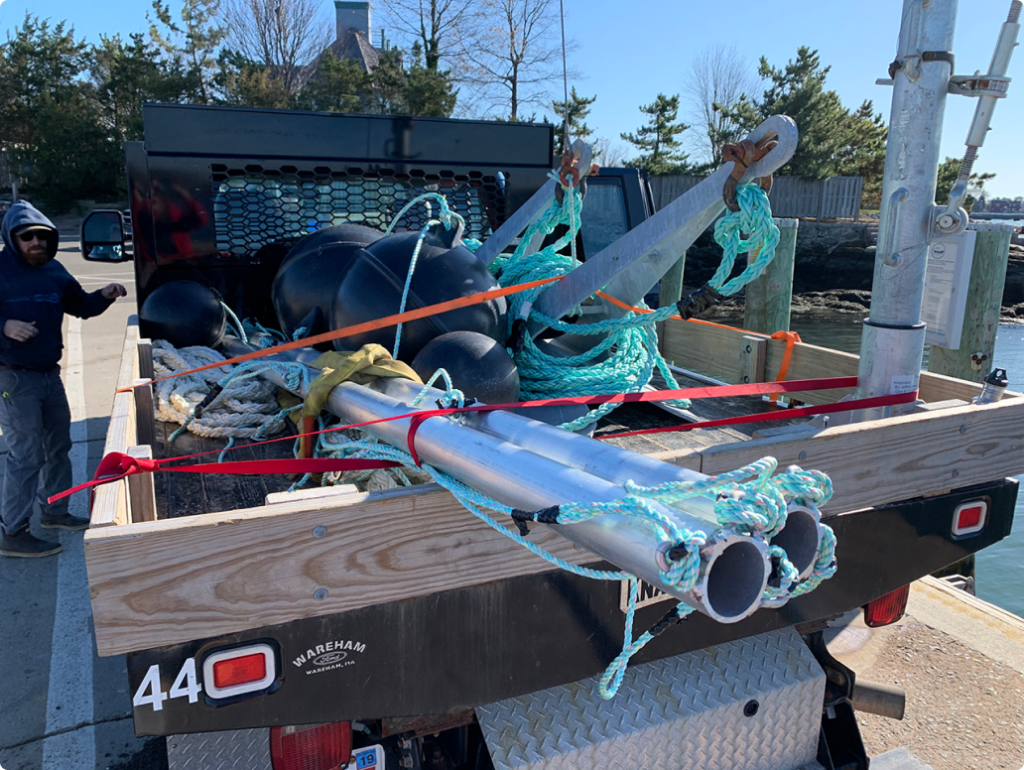
Prepare your Anchor System
Do your best to have your entire anchoring system, from the connection at the shank all the way to the anchor buoy at the surface, rigged and ready to install in advance. Mark and pre-splice your different lines and connections, so that you can spend your time on the water focusing on getting the anchors correctly deployed in the right location, and not worrying about whether the system is properly configured.
Watch this Anchor System Overview video to see an anchor about to be deployed on the GreenWave farm, with a walkthrough of the different elements of the anchoring system that have been prepped in advance.
GreenWave Tip
In case you missed it, review the lesson on Connection Points in the Gear Prep course to learn different ways to configure your anchoring system.
Watch Bren give an overview of GreenWave’s anchor system for 5-line and single line arrays
Determine Anchor Locations
During the permitting process, you will have defined your site boundaries with GPS coordinates. You may want to mark these corner points with a hazard buoy to warn boat traffic you have gear in the water; in some states, this is a requirement. Referencing the GPS coordinates of your site corners, you’ll need to figure out where exactly you plan to set your anchors within your site boundaries. This is a process of give and take between adhering to your site coordinates, and also using your eye to align your arrays and figure out equal spacing. Distances can be difficult to judge on the water at first, so it helps to identify your target locations in advance. If your site has a soft bottom and is shallow enough, you could consider using long bamboo stakes to pre-mark your anchor locations, which allows you to do a visual check on the alignment of your farm before you put your anchors in the water. Another strategy is to drop a small weighted block or anchor with a marking cork at the approximate location you plan to set your anchor, so you have a visual cue to work from. You might not hit the exact location your first try, and may have to adjust your anchor placement after you’ve put them in the water to get them to line up properly. This is something you’ll need to budget time for.
Keep in mind too that depending on the type of anchor you’re using, you might target slightly different locations for where you lower them off the boat. For drag embedment anchors (such as plow, wing, or fluke anchors) you’ll want to deploy your anchors slightly closer to the opposing anchor than you intend for them to ultimately sit. This is because after you connect the lines of your array, you’ll pull back on the anchors to achieve your desired level of tension. Deploying the anchors slightly closer together makes it easier to connect the other components of your array. For any type of anchor that needs to settle to embed properly (such as deadweight, concrete, or mushroom anchors) you’ll want to aim for as close to your final location as possible when you deploy them, as you may not be able to move them later with a smaller boat. The same would be true for helical anchors which cannot be easily moved once screwed into place.
In this video, Bren describes how to deploy embedment anchors to achieve optimal tension.